Every gaming experience relies heavily on scenarios. The ability to tailor these scenarios to align with the game’s storyline or menu choices is a crucial feature universally expected in the world of game engines. In the Unity platform, this essential function is skillfully managed by the Scene Manager. Unity’s Scene Manager serves as a capable overseer of your scenes while the game is running, functioning as a robust component of the Unity engine. This adaptable tool streamlines and enhances the process of managing different scenes, making the task of transitioning between scenarios our next focus in our ongoing exploration of mastering Unity.
Understanding Unity’s Scene Manager Script
Exploring the fundamental principles underlying Unity’s Scene Manager script, it’s crucial to recognize that all attributes and functions within this utility maintain a static nature. What does this signify? In essence, it grants developers the seamless capability to retrieve these components from any script, thereby eliminating the need for direct references. The utility of this functionality becomes apparent in the forthcoming explanation.
For harnessing the full potential of Unity’s scene manager, it’s imperative to incorporate ‘UnityEngine.SceneManagement’ within the script header. A glance at the subsequent code offers clarity on this integration:
using UnityEngine;
using UnityEngine.SceneManagement;
using UnityEngine.UI;

public class ExampleScript : MonoBehaviour
{
    void Update()
    {

    }
}
For those aspiring to seamlessly manage scenes without immersing into coding intricacies, there exist assets specifically crafted for this purpose.
Exploring Characteristics
Unity’s scene manager essence can be distilled into two fundamental attributes:
- sceneCount: This value reflects the total number of scenes currently loaded into the application;
- sceneCountInBuildSettings: It signifies the count of scenes that are active and integrated into Unity Build Settings.
These properties offer an effortless grasp of the loaded scene dynamics. To gain hands-on proficiency in harnessing Unity’s scene manager properties, an illustrative script serves as an instructive resource.
One may rightfully inquire: Is it plausible to manage multiple scenes in tandem? The unequivocal answer is affirmative. This phenomenon, referred to as Additive loading, empowers the loading of one scene atop another. Consequently, both scenes can coexist and execute their respective scripts concurrently. Nonetheless, it is essential to bear in mind that while this functionality is intriguing, it has the potential to exert strain on system performance. Developers are urged to exercise prudence when leveraging this capability, consistently weighing the trade-offs between visual appeal and operational efficiency.
Mastering the Scene Manager in Unity
Unity’s Scene Manager is a vital tool that provides the flexibility to control scenes seamlessly. Depending on the game type or application being developed, the way scenes are loaded and unloaded can vary. Delve deeper into the functionality and commonly utilized methods associated with Unity’s Scene Manager.
Determining the Current Scene in Unity
In Unity, one can discern which scene is actively loaded by deploying the SceneManager.GetActiveScene() function. This specific function provides a string output representing the active scene’s name. Notably, for applications that might have more than one active scene simultaneously, this function fetches the name of the first scene that was made active.
Here’s a concise illustrative code to display the name of the current scene:
using UnityEngine;
using UnityEngine.SceneManagement;

public class SampleCode : MonoBehaviour
{
    void Update()
    {
        Debug.Log(SceneManager.GetActiveScene().name);
    }
}
Scene Loading in Unity: The Basics
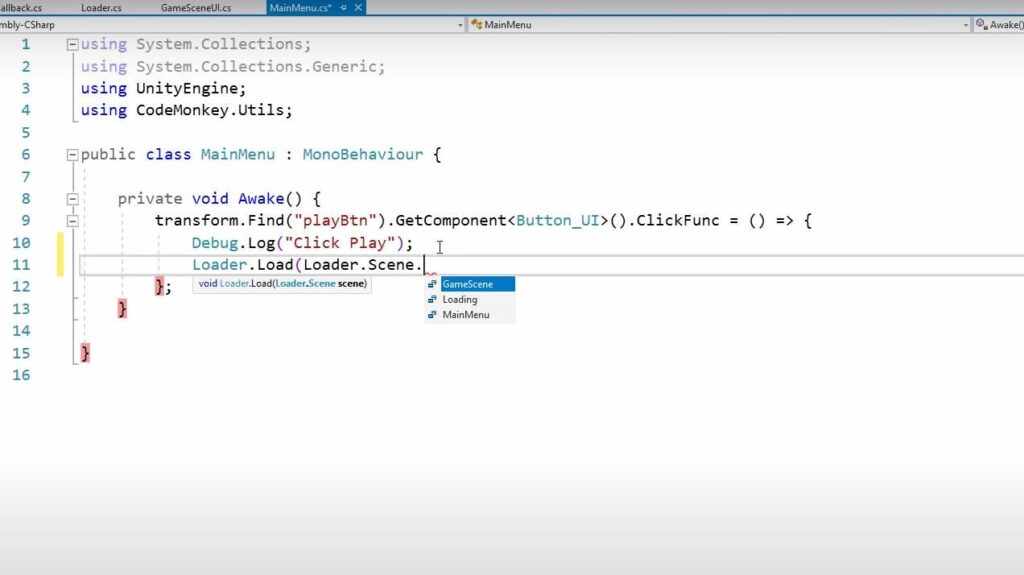
For the uninitiated, loading a scene in Unity is straightforward. Utilize the SceneManager.LoadScene() method and supply the desired scene’s name. The LoadScene() function primarily accepts a string as an argument, but it’s flexible enough to be overloaded with a numeric value.
However, a caveat to bear in mind is that for a scene to be loadable, it must be pre-included in the build settings; failure to do so results in an error.
Consider the following script as an example:
using UnityEngine;
using UnityEngine.SceneManagement;

public class SampleCode : MonoBehaviour
{
    void Start()
    {
        Debug.Log("Initiating New Scene");
        SceneManager.LoadScene("SampleScene");
    }
}
The aforementioned script, upon scene initiation, logs a message and subsequently loads a scene designated “SampleScene”. Remember, Unity is case-sensitive, so precision is key. Alternatively, scenes can be referenced by their respective build index numbers, exemplified by SceneManager.LoadScene(3).
Layered Scene Loading: Additive Loading
There are scenarios where layering one scene atop another becomes necessary. For instance, upon completing a game, displaying a leaderboard might be desirable. While this can be integrated into the existing scene, developers might prefer a distinct scene for the leaderboard, which can then be overlaid onto the primary scene. This parallels creating in-game pause menus in Unity.
The modus operandi remains largely the same as loading singular scenes, with the exception of adding a LoadSceneMode parameter to determine the loading modality, be it additive or singular.
In the absence of the LoadSceneMode parameter, scenes default to loading singularly.
Illustrative code for additive scene loading:
using UnityEngine;
using UnityEngine.SceneManagement;

public class SampleCode : MonoBehaviour
{
    void Start()
    {
        Debug.Log("Initiating New Scene");
        SceneManager.LoadScene("SampleScene", LoadSceneMode.Additive);
    }
}
Navigating the Dynamic Scene: Controlling setActiveScene()
In the realm of additive scene loading, determining the scene designated as “active” takes on paramount importance. Imagine a scenario where a player amasses a noteworthy 100 points, triggering the ascension of the leaderboard scene to the active status.
To accomplish this, we harness the power of the GetSceneByName() function, meticulously identifying the scene in question, subsequently invoking the SetActiveScene() function to breathe life into it.
It is essential to bear in mind that within the intricate tapestry of Unity’s prefab instantiation, each object is gracefully nestled within the cocoon of the active scene. Consequently, in applications featuring a symphony of simultaneously loaded scenes, any action, whether it be the birthing of objects, the surgical removal of objects by name, or the delicate art of object referencing, Unity executes these maneuvers in synchrony with the prevailing active scene.
Loading It Once Using PlayerPrefs
Loading scenes is a fundamental part of game development, and there are times when you want to ensure that a particular part is loaded only once, such as a tutorial level. In this comprehensive guide, we’ll walk you through the process of loading it only once using PlayerPrefs.
Imagine you’re creating a game, and you want to provide a tutorial for new players. It’s essential to load this tutorial scene only the first time a player launches the game to avoid overwhelming them with repeated information. Here’s how you can achieve this:
Step 1: Save an Integer to Disk
First, you need to save an integer to disk after the initial tutorial scene has been loaded. This integer will serve as a marker to determine if the tutorial has been shown before.
int tutorialLoaded = PlayerPrefs.GetInt("Loaddata", 0);Step 2: Check if the Integer is Equal to One Before Loading
Next, you’ll want to check if the integer you saved is equal to one before loading the scene the next time the player launches the game.
if (tutorialLoaded == 1)
{
    SceneManager.LoadScene("Not_tutorial_scene");
}
else
{
    // The tutorial scene has not been shown yet
    PlayerPrefs.SetInt("Loaddata", 1); // Mark it as shown
    PlayerPrefs.Save(); // Save the changes
    SceneManager.LoadScene("tutorial_scene");
}
By using PlayerPrefs, you can persistently store this information, ensuring that the tutorial scene is loaded only once for each player.
Tips and Insights
- PlayerPrefs: PlayerPrefs is a simple and convenient way to store and retrieve player preferences and data like in this scenario;
- Scene Management: Unity’s SceneManager allows you to handle scene transitions seamlessly, making it easy to control when and how scenes are loaded.
Reloading
Reloading a scene can be necessary when a player encounters a failure state within the game. Whether it’s due to a game over situation or a failed challenge, restarting the current scene is often a vital part of the player experience.
Here’s a step-by-step guide on how to reload:
Step 1: Check for the Failure Condition
First, you need to determine the condition under which you want to reload the scene. This might be triggered by a player’s failure, as shown in the example code.
if (playerFailed)
{
    // Reload the active scene
    SceneManager.LoadScene(SceneManager.GetActiveScene().name);
}
Step 2: Use SceneManager
Unity’s SceneManager provides a convenient method, LoadScene, that allows you to load a scene by its name or index. In this case, we’re reloading the active scene using its name.
Creating Dynamic Menus
Unity, a powerful game development platform, offers a myriad of tools and features that enable game creators to build immersive and interactive experiences. One essential component in many games is a menu system, which allows players to navigate through different aspects of the game, such as starting a new game, adjusting settings, or quitting the application. In this comprehensive guide, we will delve into creating a dynamic menu in Unity using the Scene Manager and provide detailed steps to ensure a smooth implementation.
Step 1: Setting Up the Script
The foundation of any menu system in Unity begins with scripting. In Unity, C# scripts are used to create interactivity within your game. We’ll start by setting up a script that will handle the loading of scenes when a button is pressed.
using UnityEngine;
using UnityEngine.SceneManagement;

public class MenuManager : MonoBehaviour
{
    public void LoadScene(string SceneName)
    {
        SceneManager.LoadScene(SceneName);
    }
}
Pro Tip: Ensure the method is declared as ‘public’ to make it accessible outside the script, including buttons, which will invoke this function.
Step 2: Crafting the Menu Elements
With our script in hand, it’s time to embark on the journey of configuring the visual aspects of our menu. In this section, we shall expertly steer you through the process of fabricating a fundamental button, endowed with the ability to initiate a scene transition.
- Fabricate a Button: Begin by executing a right-click maneuver within your Unity hierarchy, deftly navigating towards UI > Button, thereby giving birth to a button entity within your scene. It’s worth noting that if a canvas isn’t already present, Unity will seamlessly manifest one on your behalf;
- Forge an Empty GameObject: Once again, employ your right-click prowess within the hierarchy and opt for the creation of an Empty GameObject. This seemingly vacant vessel shall dutifully house the script that holds the reins of scene transitions. It is advisable to christen this entity as “SceneManager” for the sake of lucidity and organizational finesse.
Step 3: Attaching the Script
The next crucial step is to attach the script we created earlier to the “SceneManager” GameObject. Follow these steps:
- Select the “SceneManager” GameObject in the hierarchy;
- In the Inspector window, click on Add Component and search for the script by its name, which is “MenuManager” in our example.
Step 4: Configuring the Button
To make the button interact with our script, we need to set up an event that calls our “LoadScene” method. Here’s how:
- Select the button GameObject you created earlier;
- In the Inspector window, find the Button component and locate the On Click Event section;
- Click on the + button at the bottom right of the On Click event section to add an event;
- Drag and drop the “SceneManager” GameObject into the newly created event slot;
- In the “No Function” dropdown menu, navigate to and select MenuManager > LoadScene;
- In the input field below, enter the exact name of the scene you want to load. Be cautious as scene names are case-sensitive. For accuracy, consider copying and pasting the name from your scene assets.
Step 5: Testing the Menu
With everything set up, it’s time to test your menu system:
- Run the scene by clicking the Play button at the top of the Unity interface;
- Interact with the button you created, and your designated scene should load seamlessly, demonstrating a successful menu system implementation.
Effective Management in Unity
When multiple scenes are active simultaneously, efficient resource management becomes crucial. By diligently unloading scenes that aren’t currently in use, developers can achieve several benefits. Firstly, it enhances the game’s performance, as redundant data isn’t consuming memory or processing power. Additionally, maintaining a clutter-free workspace is essential for effective development, and unloading unnecessary scenes aids in this endeavor.
Method to Unload
It can be efficiently unloaded using the SceneManager.UnloadSceneAsync() function. The term ‘Async’ indicates the asynchronous nature of the operation, meaning that the scene unloading occurs in parallel without disrupting the ongoing game processes. This mechanism ensures that players or developers aren’t halted in their tracks and can continue with their gaming or development activities even as scenes are being offloaded.
Practical Application: Integrating the Leaderboard
Consider an example where there’s a need to display a leaderboard after a certain game level – let’s call it ‘Level 1’. One might be tempted to think that simply loading the leaderboard scene as a standalone is sufficient. However, with a more nuanced approach, there’s an opportunity to enhance the player experience.
Instead of an abrupt transition, developers can create a seamless experience by first loading the leaderboard scene concurrently with Level 1. By doing so, there’s a window of opportunity to integrate engaging elements – be it captivating animations, immersive audio, or dynamic particle effects – that occur in Level 1, all while the leaderboard is on display. It creates an overlapping transition that not only keeps the player engaged but also adds depth to the gameplay.
Once all the dynamic processes and transitions in Level 1 are completed, it’s a strategic move to unload the scene. This ensures optimal performance, while also giving players a holistic experience. The method underscores the blend of aesthetics and efficiency that goes into creating a compelling game in Unity.
Conclusion
In conclusion, Unity Scene Management is a fundamental aspect of game and application development that empowers developers to create immersive and dynamic experiences. Throughout this article, we’ve explored the core concepts and functionalities of Unity’s Scene Management system, delving into the advantages it offers in terms of organization, optimization, and user engagement.
We’ve learned that Unity’s Scene Management not only simplifies the process of building and maintaining complex projects but also enhances the overall user experience by enabling seamless transitions, loading screens, and level management. By effectively utilizing scene management techniques, developers can optimize performance, reduce loading times, and deliver polished, cohesive experiences to their audiences.