Unity, the renowned game development engine, empowers developers to create immersive and interactive 2D and 3D experiences. While Unity offers a plethora of built-in features and components, the ability to extend and customize your game objects is crucial for bringing your creative visions to life. One of the fundamental skills every Unity developer must master is the art of adding components to GameObjects through scripting.
In this article, we’ll dive into the fascinating world of Unity scripting, exploring how you can dynamically attach components to GameObjects at runtime. Whether you’re a seasoned Unity developer looking to enhance your workflow or a newcomer eager to harness the full potential of this game engine, this guide will provide you with the knowledge and techniques you need to effectively add and manipulate components using C# scripts in Unity.
Efficient Component Management in Unity Games
In Unity game development, managing components efficiently is crucial for optimizing performance and maintaining a smooth gaming experience. Adding components to game objects dynamically, especially during gameplay, requires careful consideration. In this comprehensive guide, we will explore the best practices for adding components to game objects and offer valuable insights to enhance your Unity coding skills.
Why Care About Efficient Component Management?
Adding a component to a game object during gameplay might seem convenient, but it can have significant implications for your game’s performance. Here’s why you should be mindful of component management:
- Memory Consumption: Each added component consumes memory resources, and adding multiple components frequently can lead to excessive memory usage;
- Performance Impact: Frequent component addition or removal during gameplay can cause performance bottlenecks, leading to laggy and unresponsive games;
- Code Maintainability: Uncontrolled component addition can make your codebase messy and hard to maintain, especially in larger projects.
Now, let’s delve into two scenarios of adding components and how to do it efficiently.
Adding a Component to the Same Game Object
Often, you’ll want to add a component to the same game object to which your script is attached. For instance, you might need to add a Rigidbody component under certain conditions. Here’s how to do it efficiently:
using UnityEngine;

public class AddCompExample : MonoBehaviour
{
    void Update()
    {
        if (condition)
        {
            // Efficiently add a Rigidbody component to this game object
            this.gameObject.AddComponent<Rigidbody>();
        }
    }
}
Adding a Component to a Different Game Object
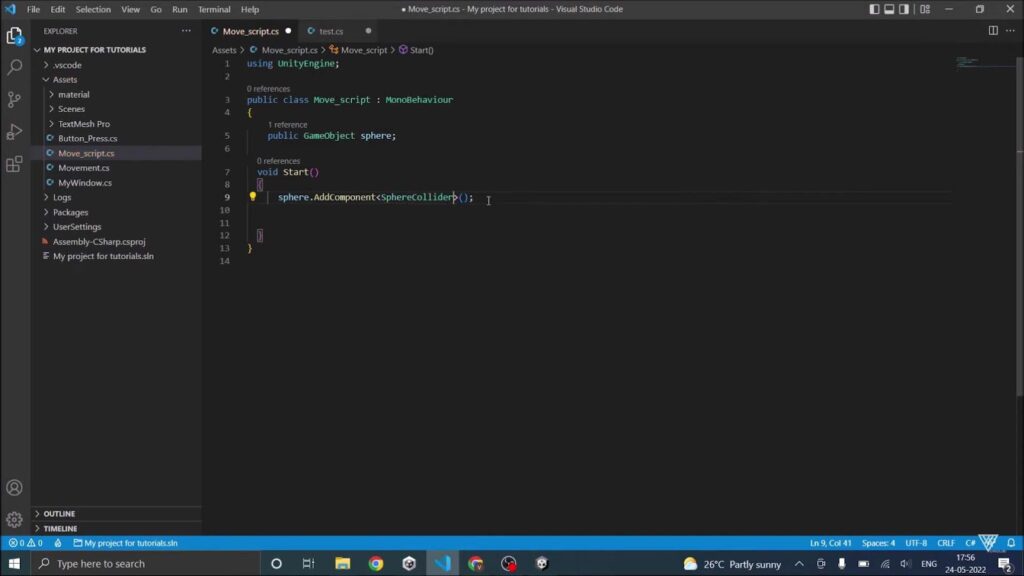
Sometimes, you may need to add a component to a game object other than the one your script is attached to. Consider a scenario where you want to add a Rigidbody component to a ball game object when a condition is met. Follow these steps for efficient component addition:
Create a public variable to hold the reference to the target game object in the script.
using UnityEngine;

public class AddCompExample : MonoBehaviour
{
    public GameObject ball; // Assign the ball game object in the inspector

    void Update()
    {
        if (condition)
        {
            // Efficiently add a Rigidbody component to the ball game object
            ball.AddComponent<Rigidbody>();
        }
    }
}
Efficiency Tips for Component Management
To further enhance your component management practices, consider these tips:

- Minimize Component Swapping: Avoid frequent addition and removal of components during gameplay. Instead, add necessary components during initialization;
- Use Object Pooling: For frequently created and destroyed objects, consider using object pooling techniques to reuse objects with components;
- Batch Component Operations: If you need to add multiple components, batch the operations together to reduce overhead;
- Cache Component References: Store references to frequently accessed components to avoid repeated GetComponent calls, which can be costly.
Removing Components in Unity: A Comprehensive Guide
Within the realm of Unity, the art of tinkering with components stands as a cornerstone in the grand tapestry of game development. When it comes to the task of appending components, one can navigate this endeavor with relative ease using the AddComponent method. However, when the moment calls for the removal of these elements, the landscape becomes notably more intricate. Unity, in its wisdom, extends an olive branch to developers in the form of the Destroy function as a means to address this challenge. Yet, one must approach this formidable tool with a sense of utmost care, for its careless utilization can potentially unleash a torrent of unintended repercussions, including the obliteration of the entire game object or even the very script that governs it.
How to Remove a Component Using Script
To demonstrate the process, we’ll focus on removing the Rigidbody component from a game object when a specific condition is met. Here’s a step-by-step breakdown:
Step 1: Create a Script
Begin by creating a C# script in Unity, which we’ll name removeCompExample. Attach this script to the game object that contains the component you want to remove.
using UnityEngine;
using System.Collections;

public class removeCompExample : MonoBehaviour
{
    Rigidbody rig;

    void Start()
    {
        rig = this.gameObject.GetComponent<Rigidbody>();
    }

    void Update()
    {
        // Replace 'condition' with your desired condition for removal
        if (condition)
        {
            Destroy(rig);
        }
    }
}
Step 2: Access the Component
In the Start method, we use this.gameObject.GetComponent<Rigidbody>() to retrieve the Rigidbody component from the current game object. Ensure that you replace Rigidbody with the specific component type you intend to remove.
Step 3: Define the Condition
Within the Update method, we include an if statement that checks a user-defined condition. This condition should reflect when you want to trigger the removal of the component.
Step 4: Remove the Component
When the condition becomes true, the Destroy function is called on the rig variable, effectively removing the Rigidbody component from the game object.
Pro Tips and Best Practices
- Safety First: Always double-check your conditions and ensure they are accurate to prevent unintentional component destruction;
- Backup and Debug: Before implementing component removal, make backups of your project or create a separate test scene to experiment safely. Unity’s debugging tools can also help identify issues;
- Null Checking: To avoid potential errors, consider adding a null check before calling Destroy. Verify that the component you intend to remove exists;
- Component Dependencies: Be aware of dependencies between components. Removing a component may affect others, potentially causing unexpected behavior. Make sure to handle these dependencies appropriately;
- Script Organization: Maintain a well-organized project structure. Clearly label scripts and use meaningful variable names to enhance code readability.
Efficiently Managing Components in Unity During Runtime
One of the most straightforward ways to add a component is by using the Unity editor. Here’s how to do it:

- Select Your Game Object: Begin by selecting the GameObject to which you want to add a component. This could be any object in your scene, like a character, a weapon, or a UI element;
- Open the Inspector Window: Once you’ve selected the GameObject, open the Inspector window. You can usually find it in the right-hand panel of the Unity editor;
- Click “Add Component”: In the Inspector window, you’ll see a button labeled “Add Component.” Click on it to open a searchable list of all available components in Unity;
- Search and Select: Use the search bar to find the specific component you want to add. Unity provides a vast library of components for various purposes, from physics to rendering to audio. Select the component you need;
- Configure the Component: After adding the component, you can configure its properties in the Inspector. This allows you to fine-tune its behavior to suit your game’s requirements.
Enabling and Disabling Components Using Scripts
In some cases, you may not want a component to be active from the start. You can enable or disable components during runtime based on your game’s logic. Here’s how to do it through scripting:
using UnityEngine;

public class EnableComponentExample : MonoBehaviour
{
    // Declare a reference to the component you want to enable or disable.
    Rigidbody rig;

    void Start()
    {
        // Get a reference to the Rigidbody component.
        rig = this.gameObject.GetComponent<Rigidbody>();
    }

    void Update()
    {
        // Check your game logic to determine when the component should be enabled or disabled.
        if (componentRequired)
        {
            rig.enabled = true; // Enable the component.
        }
        else if (componentNotRequired)
        {
            rig.enabled = false; // Disable the component.
        }
    }
}
Conclusion
Efficiently managing components in Unity during runtime is essential for optimizing your game’s performance and functionality. Whether you choose to add components through the editor or enable/disable them using scripts, understanding these techniques empowers you to create dynamic and responsive games. If you have more questions or need further guidance, please don’t hesitate to leave a comment below. Your Unity journey is filled with exciting possibilities!